I help gardeners grow
& beginners blossom.
No seed left behind,
no soil unturned.
Together we can have lots of fun growing
great gardens using simple practical tips.
- Featured in -


Start saving & storing your garden seeds for a more more sustainable future
SIGN UP to get the FREE Seed packet PDF
X CLOSE
Back to Reality: Renovating our Front Yard to Remove The Lawn and Add Edibles
A dead lawn is not a pretty picture. We need to do something about it but neither Helpful Husband or myself have any interest in lawn care.

Our lawn was mostly dead and filled with moss and weeds. In fact the weeds seemed to keep growing while the lawn was dormant. It was just too much work and the enjoyment factor was zero. We had to do something so we smothered the lawn with cardboard and started fresh with our front yard.
So what is your motivation for making changes in the garden? My motivation is reality. We are finally facing reality. It rains a lot in the winter here and is dry in summer. So without irrigation the lawn is dead from May to September.
Meanwhile the fringe of green and blooming shrubs (including the Michel Trudeau rose but mostly just leftovers from the previous owners) are still alive even though our irrigation system imploded three years ago. It is time for a change so we completely renovate our front yard in a slow and methodical way. We keep the overall costs reasonable and the environmental impact positive. Our goal is to keep it nice but not too fancy. We probably should have removed the house too but that seemed extreme.

It all started with Helpful husband. He had better things to do so he stopped mowing or watering the lawn. Also, he wanted to tear out and replace our old concrete driveway to make it wider. So we asked for a second opinion (my idea) and concrete guy nixed the idea of removing our paved drive – mainly because it is still in good shape. But the 10 foot wide drive barely leaves enough room to pass the parked cars without dragging dirt off parked vehicles. And after navigating the tight space, guests still have to walk up a set of steep stairs to reach the front door.
So with pencil and paper and I do what I usually do for clients: a front landscape redesign starting with more parking for all our toys and vehicles. We have two trailers (one for kayaks) and one for general hauling of landscape materials. We have a van for camping and we have a car. So beginning in 2016, we flatten the right side of the yard, building a small wall to contain the plants, and we create extra parking for gear.

Cleaning up the slumping landscape on the right of the front yard gives the space a neater appearance plus extra parking.

The new wall, built in 2016, helps hold soil and allows for extra parking. We call this phase 1 of the overall front yard project.

Looking down on our new front wall and newly flattened area for extra parking. After flattening the area we add a layer of gravel to match the front boulevard material.
We have a small view from our front yard so it is important to keep new plantings low. We agree to leave the existing shrubs and trees – but add no new trees. We also want to use this very hot dry space to grow some of the things that really need heat and drought. We add plants that tolerate deer (mostly) and our overall goal is “pretty as well as ornamental and edible.” We also love hummingbirds and we want to encourage them. And mostly I want the new approach to the house to be welcoming. No more dragging past cars or climbing steep steps to enter the house. We add a wider approach and shallow, wider stairs.

We learned from experience that Globe artichokes are pretty, edible and deer proof. So we add more in our new front yard!
Artichokes are real people pleasers because they are edible, deer-proof and interesting. When we start using them along our side boulevard people stop to ask about them. So we use them again in the front. What fun.
Okay- seriously – last point: I fall in love with watermelons when my grandkids ask me to grow them. They thrive in heat so the sunny front yard seems like the best place to add melons. And so the planting plan evolves to include seasonal watermelons, deer-proof food such as onions, garlic and leeks and blooming Salvias to feed hummingbirds. (I love Hot Lips Saliva because they last well into fall even though they are not always hardy and usually die over winter.)

Mid-way through our renovation – when we had loads of bark and a dead lawn – we started growing watermelons and found they were both deer proof and drought tolerant. Later we discovered the deer developed a taste for these luscious fruits so we started protecting them. Here my grandson Kale holds one of our Jade Duchess watermelons. It is a dwarf variety and fruit are usually around 8-10 pounds.
We start the big landscape redesign with the right side of the yard in 2016. We replace a slumping, sprawling planting area with a short wall and we gain a level gravel parking area for utility vehicles. Using gravel instead of hard surfaces everywhere ensures moisture penetrates the ground instead of running off into the roads and sewer system.
We start killing the main lawn in the fall of 2016. The first step in killing a lawn is to cover it with cardboard and wood chips. We get the cardboard at various grocery stores and the free wood chips from arborists pruning in our area. We are re-using instead of recycling. A positive thing and so easy to do.

Cardboard laid over the old lawn and covered with fresh free wood chips from various arborists does quick work of killing a lawn without removing the valuable topsoil . This buys us some time (almost a year) before we hire help to build walls, beds and a patio on the left side of our front yard.

The front yard shrubs are nice enough and self-sufficient but some have to be pulled to make room for a wider, more welcoming entrance patio and stairs.

The first work for the bobcat on the left side of the front yard in 2017 is to remove extra shrubs, push back the now dead lawn into a pile of compost and bring in gravel to build a base for the stairs and patio we want to build.

Building the walls and walks takes a couple of weeks and costs thousands of dollars for labour and material (I am guessing $5,000- $10,000 but we never really add it up because we don’t really want to know.) The work tears apart what was left of our irrigation system so everything is on its own – water-wise – for two summers.

The dead lawn, cramped parking and steep walk gave us the incentive to redo our front yard landscape. This view after shrubs are removed and wall is underway takes the better part of a month of construction.

Once the stairs are poured in concrete using the brick walls as the forms, Onyx tile is laid over them to give a finished look. The new front stairs are only 5 1/2 inches deep and in 2019 we add LED lights under the treads so they guide visitors into the yard at night.

Once up the first set of stairs, the paved and tiled walk welcome you to the gravel sitting area. Using gravel is cheaper than concrete and it is better for the environment because water infiltrates into the ground.

Our gravel patio means better water infiltration during the rainy season and lower cost overall. Plus it makes a crunchy sound when you walk on it!

View from the house while we were killing the lawn with bark chips in 2016. Notice the rose in the middle has survived the whole process including deer, drought and lack of care during the two years it took to build this new area.

View from the house at about the same time of year shows the Michel Trudeau rose (middle back) still blooming this June. The new planter box is home to our watermelons and other vegetables including onions and leeks as well as some volunteers like snapdragons and cilantro.

Ornamental onions planted fall 2018 are visible from the street and behind them you can see the floating row cover used to protect the watermelons planted earlier this spring.

A close-up of the Michel Trudeau Rose (named for Prime Minister Pierre Trudeau’s son) survives in the toughest conditions including deer and drought.

Onions are included in the new front planter because the deer don’t eat them and they love the heat in the brick-block planter. We set up a soaker hose and turn it on every couple of days to add water to this giant planter filled with edibles and flowers that find their way in on their own. So far this spring the self seeded plants include snapdragons, cilantro, fennel and rudbeckia. The plants we added include onions, garlic, leek and of course watermelons.
So this is our new front yard: it is more accessible (several shallow stairs instead of one long run of steep stairs, easier to look after, easy to water efficiently, fun to sit in and enjoy in the evening, and a great source of interesting edible and ornamental plants. One of the biggest surprises is that snapdragons have planted themselves and are obviously deer proof. We have taken out our lawn and use our spare time to care for our melons and artichokes and hummingbird-attracting Salvia. Oh, and having a glass of wine to enjoy our view on our new patio.

I started the artichokes from seed this February and planted them in May along the east side of the patio. They are already in bloom by early July and they are definitely deer proof.
Timeline for Front Yard Design and Install:
June 2016 – Start and finish the right side of the front yard to allow more parking right away.
September 2016- Kill what is left of the front lawn with cardboard and wood chips
June 2017 – Start and finish walls and large planter on left side of the front yard.
October 2017- pour concrete steps to house and sidewalk to join the two sets of steps.
April -June 2018 – Fill planters with soil and shape planting beds. Add a top-dressing of purchased wood mulch so entire planting area is filled with soil and topped with mulch. Plant salvia for hummingbirds and watermelons for grandchildren. Fantastic results with 17 Flower Dragon watermelons in total the first summer.
May- June 2018 – Finish laying and finishing giant tiles over smooth concrete steps and sidewalk. Bring in gravel and set out chairs to start enjoying front yard patio area.
March – May 2019 – Soil settles in our giant planter so I add more garden soil and then plant onions, leeks, garlic and Sweet Beauty watermelons. Helpful Husband and helpers Heather and Brennan install LED lighting under the stair treds. I bring plant pots, bought years ago for this project in Kelowna (Dogwood Nursery), to the front steps where they can finally be enjoyed this summer!
Patio Party: TBA
Donna Balzer is the Brand Ambassador for BCGreenhouse Builders and she has two greenhouses in her big backyard.

What Would Donna Do?
Get my growing and gardening tips and pointers throughout the season.






So nice! Thanks for your comments.
We redid our yard this summer and we just finished all the landscaping. It was a huge project, big enough to need a dumpster, but the landscaping turned out awesome! We’ve been discussing what to do with our patio now and that picture of your little firepit is exactly what I’d love to do. Thanks for the inspiration!
We used crushed washed gravel of a medium to small size about 20 mm). It was placed in a 4″ layer over the base level that was there because we had initially planned to pour concrete over the whole area. This base layer was packed and unwashed gravel the concrete firm had suggested as a base for concrete (I think about another 4″) You are correct that deep gravel can be hard to walk on but it is also the difference between crush and round. The crush settles in nicely and the round keeps moving. Although I love the look of round – especially round 10 mm because it is so pretty, we decided to use the irregular shaped crush.
I’ve been thinking (for a few years now) about converting an overgrown, uncared-for part of our back yard into a patio area, and really like the idea of the gravel patio. The reason I haven’t done anything yet is because I keep going back and forwards on a wood deck vs flagstone. But… the gravel patio idea I really like. How deep is the gravel you put in? I’m thinking too deep and it would be hard to walk on. What kind of gravel did you use? Thanks!
Hi Jenn- what a fun story. Lawn is such a waste eh? Enjoy your kids and garden and just slowly – ever so slowly start putting your ideas to paper. I use the grid paper and kept it by the window for a year as I made changes. Having a big chunk of the yard as a permanent outline or path makes a huge difference. It simply looks like a plan to be a jungle rather than a jungle with no plan.
Hi Rob- Thanks for your comment! I was interviewed about it and asked to submit a few photos for a book project and then I realized – Heh – maybe others want to see that it is not such a big deal to slowly and carefully start making serious changes. We certainly don’t have to mow anymore!
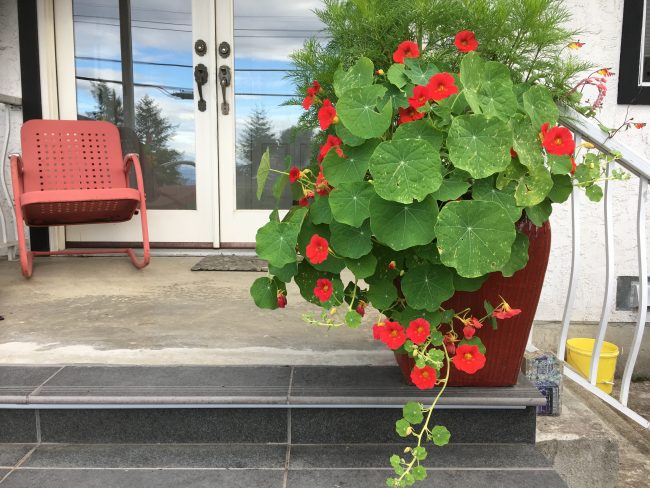
Thanks Heather. It was a slow build and then suddenly I realized we are done. Sort of. The deer ate my beautiful Aloha nasturtium in the front pot last night! But that got me thinking of adding a pot of bamboo to those beautiful red pots so its all good.
What a beautiful front yard you’ve created! I love it. Thanks for the step by step process. It feels more accessible this way and not as intimidating. Enjoy the wine and view. And watermelons!
Donna,
I admire your documentation of this wonderful project!
Thank you for sharing it.
Kind Regards,
Rob
Oh I’m so inspired!
We moved into our house in Nelson 2 years ago and I quickly sheet mulched our lawn in the front yard too making way for a more edible, bee and bird friendly, and beautiful environment!
I’ve been growing veggies, flowers and fruit in the front yard for a couple years now but without much design. It’s quite a jungle, which is super fun for my toddlers but I would love a more grown-up design. Or a design, period. Ha ha.
This has really helped me to sort out what I want and need. And to recognize that my garden, like me, is a work in progress 🙂