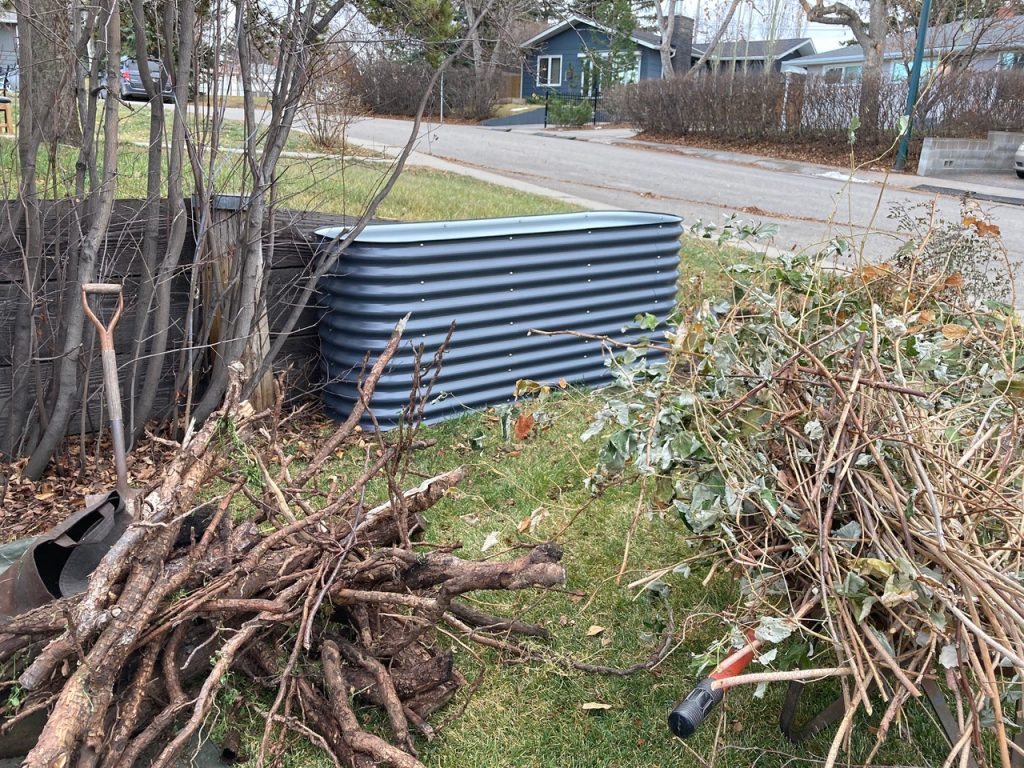
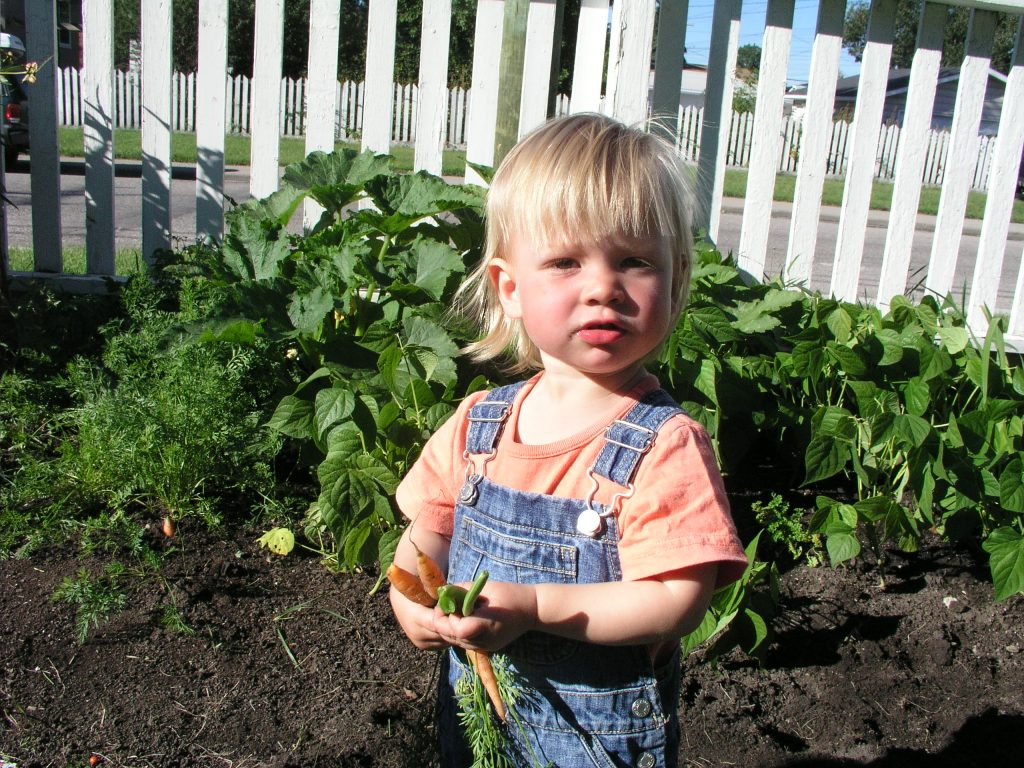
My home-made pop-up garden built in 2014 looked really great with it’s first crop of winter squash. But looks deceive and the success of these early beds didn’t last.
A New Garden Project
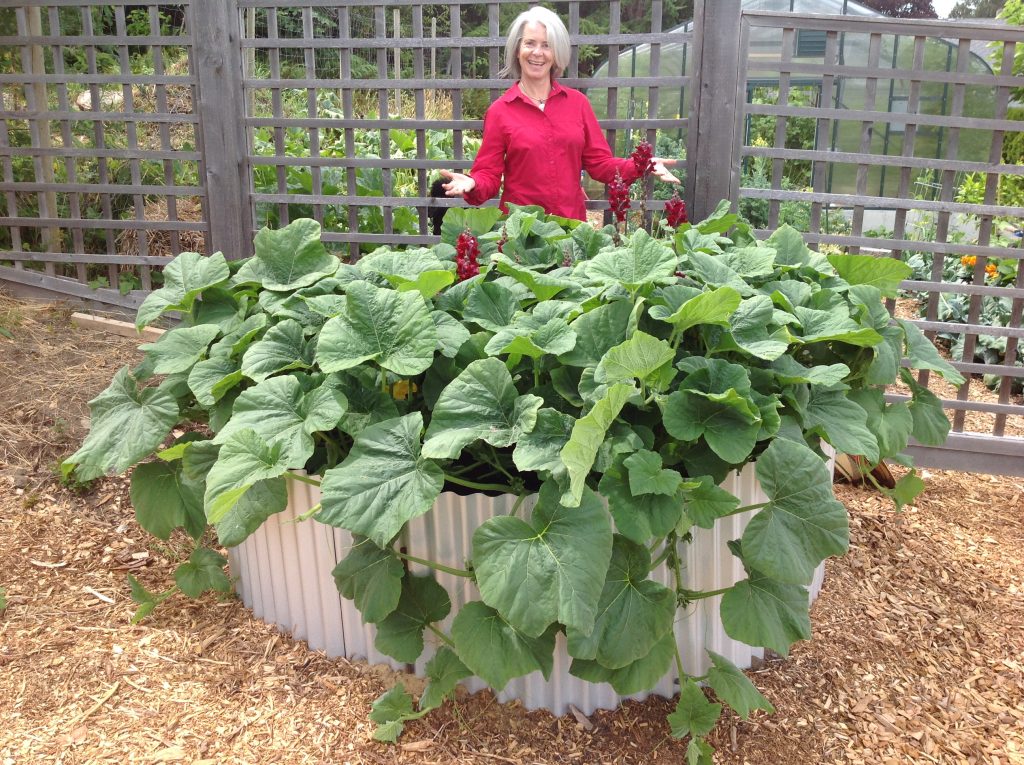
As a gardener, I love projects. In fact, I think pursuing new ideas is my specialty. And so, when I was in my “pop-up” garden phase and thinking of writing a book about this very topic, I made myself a giant planter for my boulevard (see above). I ordered sheet-metal roofing material cut to size at the local hardware store and had it delivered (It was heavy). Then I worked with helpful husband to get the pieces of my new raised planter into position, screw the panels in place and fill it with soil. I finally planted my huge box and my winter squash loved growing in it right away. The deer, who normally browse everything exposed, even left it alone – the first year. But by the very next year, the deer noticed I was growing squash in my box and they started jumping right up into the planter and eating the squash to the ground! Only my asters and spring daffodils survived the onslaught!
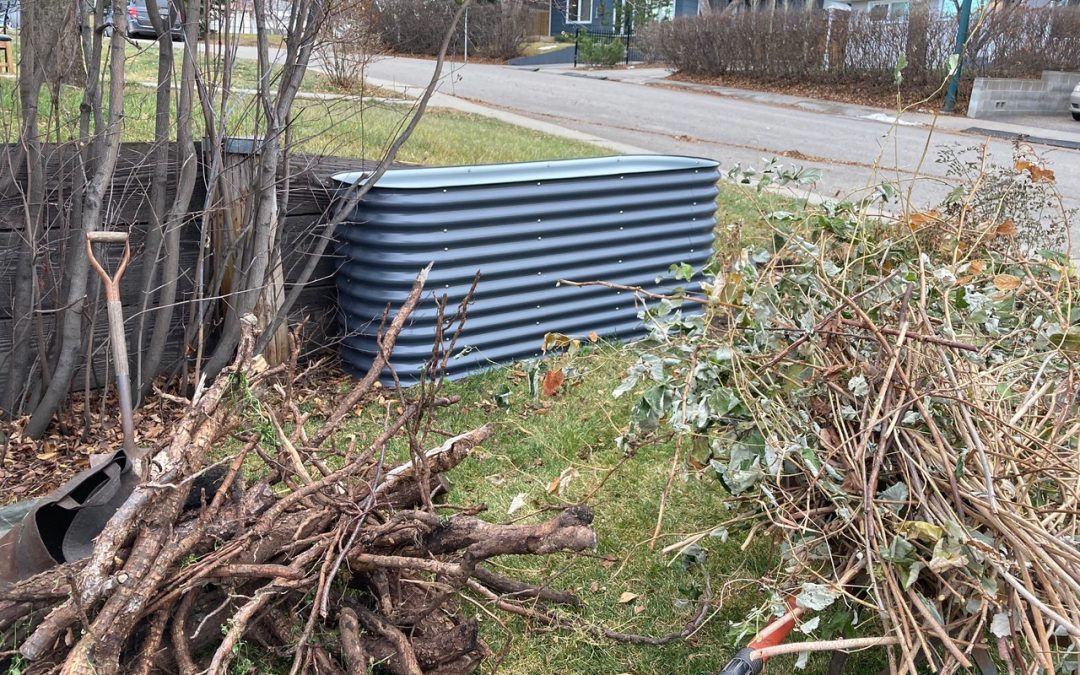
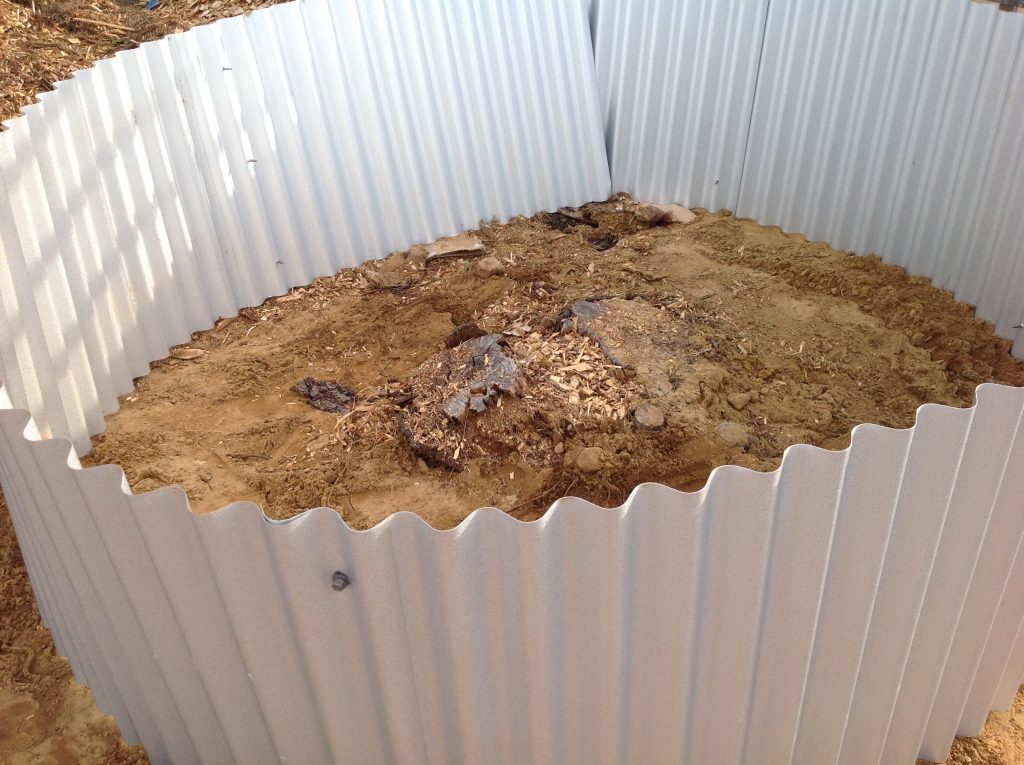
My brand new commercially available Sproutbox Garden is shown here, ready to be filled with materials I have been gathering from fall projects in my yard such as old tree roots and raspberry canes ! This “boxed” Hugelkultur garden is already cleaner and neater than my home-made box ever was and it is also food safe.

After I ordered a piece of roofing material, Helpful Husband connected it all together to make a planter (shown at top filled with winter squash) 6 feet (2 metres) across. This took a bit of math and a whole 14′ long sheet of metal roofing material cut into equal pieces by the supplier.
Trouble With Home-Made Planters
Things started to go wrong almost right away with my home-made planter box. The sheer size of the round “box” (six feet across), the freezing and thawing action of the natural soil, the uneven sinking of the soil and the weight of the soil exerted on the sides of the planter made the whole planter shift and sag over time. On top of that the cleanly cut edges of the roofing material were very sharp and I think Helpful Husband got several cuts on his hands in the process of building me this box. He eventually wore gloves but it was too little too late.
The sheet metal that was screwed together to make my “homemade” planter was overlapping on each connecting piece and on the ends for extra strength and to give the structure more support. In other homemade planter boxes I have seen people use garden hose, cut in half, to soften the sharp edges. In the box above you can see how we placed it over an old pine stump instead of removing the stump and this worked out just fine and saved us loads of money.
I am not a perfectionist but I was was not as thrilled with my home-made sheet metal pop-up planter right from the start so we supported it with extra rebar all around the structure to give it more strength and stability. By the fifth year after it was built, the planter was warping and sagging quite a bit compared to when it was brand new. And then there was the little detail about food safety. I wasn’t sure if food grown in aluminum roofing material coated with zinc was food safe so I moved away from growing food to growing ornamentals in my big boulevard box.
A few weeks ago, Helpful husband’s cousin invited us over to see her new metal grow boxes and I was smitten. The prebuilt Sproutbox garden planters look perfect in every way – but will they work for me in my new zone 3 garden with heavier soil and within the confines of my smaller yard and new greenhouse?
Rebar placed around the circumference of my original pop-up planter helped hold it in place, at least at first.
Sproutbox Gardens Amaze Me:
Bill & Marinette are perfectionist growers. And every year they amaze me by how much they grow in their wooden planters, hand built by Bill, on the side of their house. Strawberries, asparagus, herbs and cabbages grow equally well in their wooden raised beds. But it was time. Their old wood boxes were rotting and falling apart. They needed to be replaced but they didn’t like the idea of building new wood boxes every four or five years. And then they discovered Sproutbox gardens, guaranteed to last 20 years.
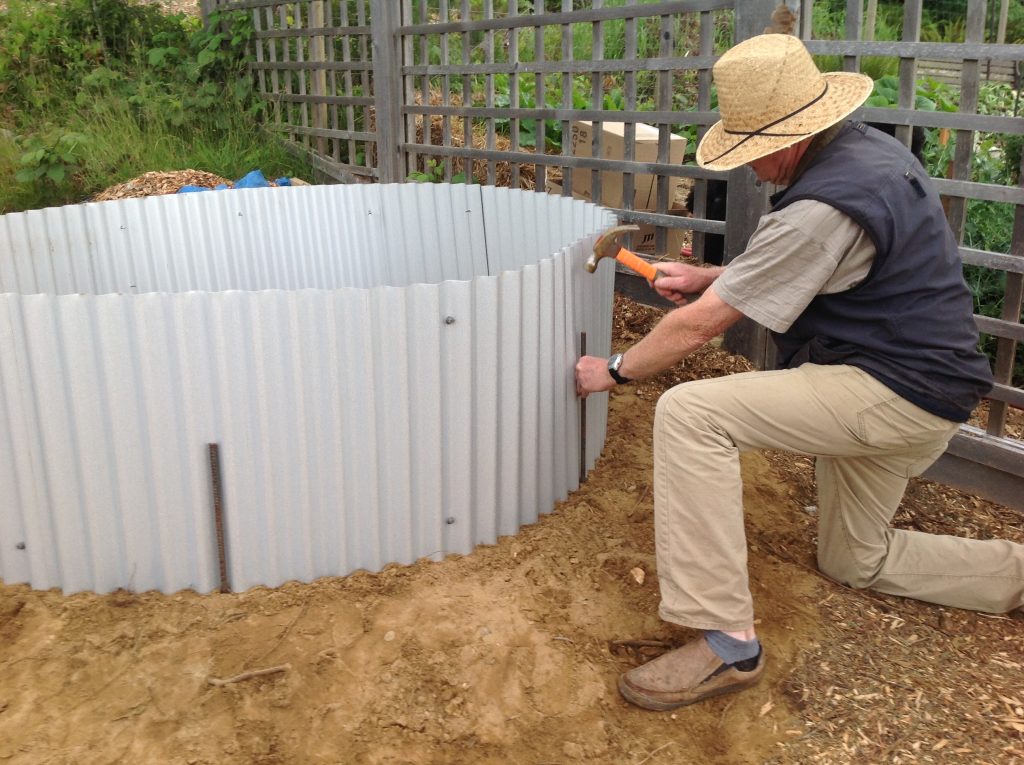
By the time I dropped by to see how their garden planters are working, they are beaming with excitement. Sproutbox differs from my homemade system because of at least three things. First, Sproutbox gardens include “internal bracing rods” and second, the top edge of exposed metal has “rubber edging”, and according to Sproutbox garden owner Erick Penner, this edging comes with all systems sold. This solves a big problem in Bill’s mind because he didn’t want the sides of the boxes sagging and stretching apart (like my home-made ones) and he definitely didn’t want his wife working with a system that might cut her hands if she leaned on the exposed metals edges. The rods and rubber edging are included in all the boxes sold.
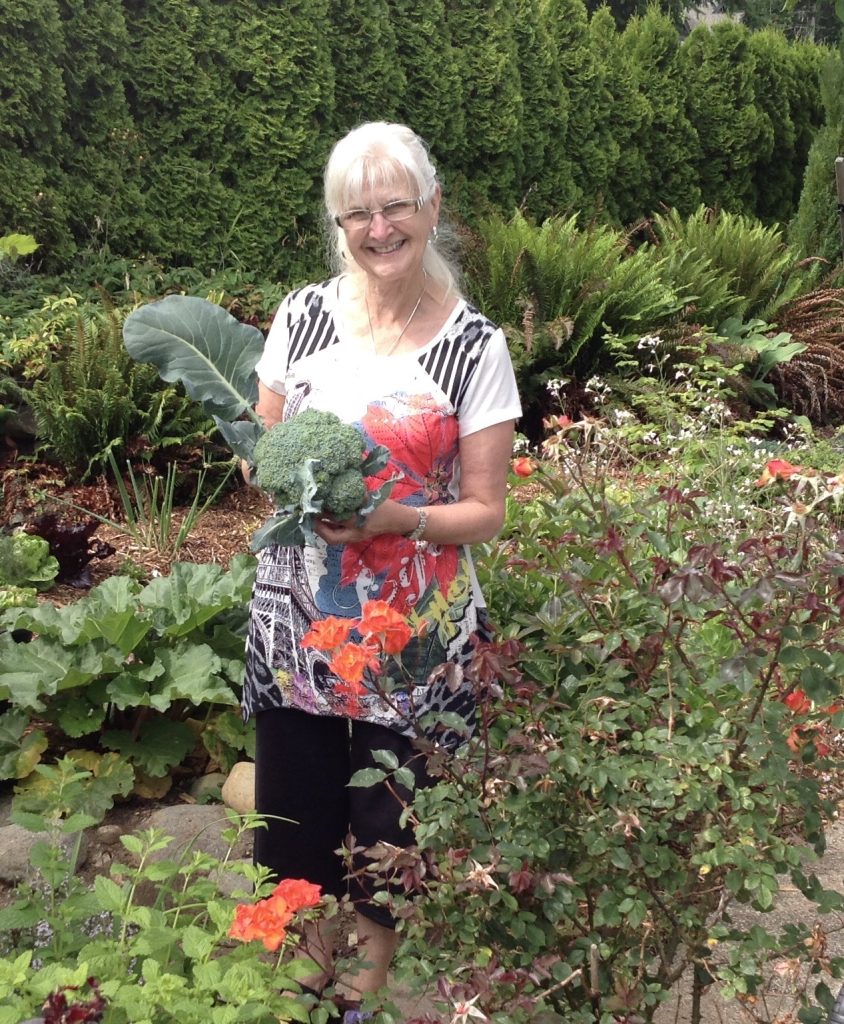
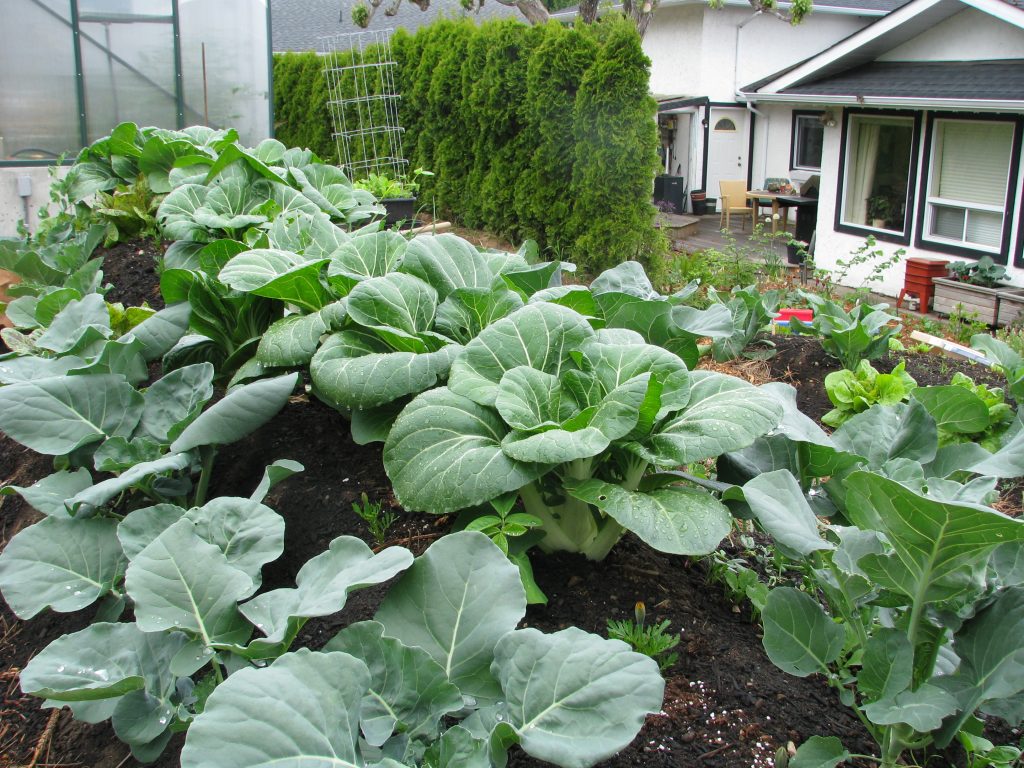
Marinette is an excellent cook and here she holds a perfect broccoli from my garden – just picked and ready to cook.
Finally, the third advantage to the Sproutbox is safety. According to Penner, and his web site, the metal used in these boxes is food safe. This means both roots crops and leafy green vegetables can be grown in the these container boxes without harming gardeners who eat the food grown in them.
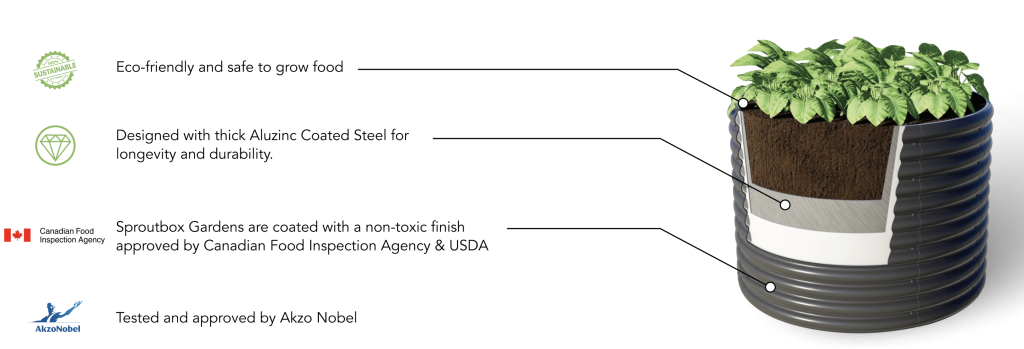
(Screenshot from Sproutbox website indicates these boxes are foodsafe )
The Water Reservoir Trial: Saving Water
I immediately connected directly with Penner and I asked if he would support a small study in my zone 3 home garden. And the answer was yes and, full disclosure, he was also willing to sign me up as a Brand Ambassador and offer a discount coupon (Use DonnaB10 in their online shop) SEE HERE. Seems too good to be true. So with these three critical items resolved, I ordered the boxes and they arrived in less than a week.
In my BC Greenhouse Builders Cape Cod greenhouse I will install a 2’ wide x 6.5’ steel gray Sproutbox garden, and compare it to the same box growing outside with the same orientation. Adding a twist (making these boxes self-watering) will let me travel more during garden season because I will be able to water less frequently while still growing loads of vegetables. Containers with water reservoirs are known by other names such as wicking beds and SIP pots as well as self-watering boxes.
But “self-watering” doesn’t mean they do it themselves. It just means the pots have a big water reservoir in the bottom so they don’t have to be watered as often. Check Out This Article by Steven Biggs HERE. Sproutbox gardens don’t come as self-watering boxes and in fact they have no bottom at all because they are intended to be placed directly on the garden soil. I will retrofit the boxes using Steven’s ideas and helpful husband’s assistance. This will give me a watering break during the heat of summer and should mean lower overall water use because the plants have to send down roots to “wick” up moisture, reducing water lost to surface evaporation. In the water reservoir trial I will add place one box inside my greenhouse and one outside to compare watering and plant growth directly.

I built my newest greenhouse, a BC Greenhouse Builders Cape Cod design, on August 28, 2023 in my new Calgary garden. Now that the sproutbox gardens have arrived, the planning begins!
The Hugelkultur Trial: Saving Money on Soil and Water
In my old garden I became a huge fan of Hugelkutur (see my Youtube video HERE) because decent soil on Vancouver Island is expensive and hard to get. In my old garden I created beautiful Hugelkultur mounds, mostly from waste wood and organics with only an inch of purchased soil on top of each mound. This let me get rid of woody organics without waste and also save tons of money on soil purchase while I build my own quality soil for my vegetable beds.

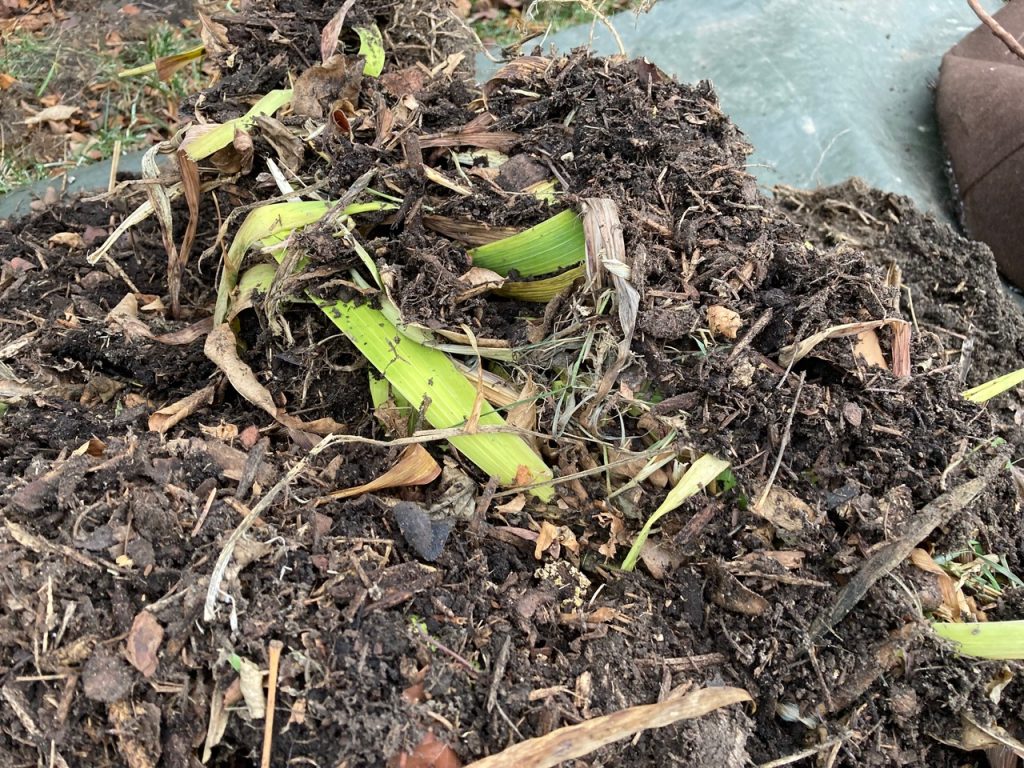
In the beginning a Hugelkultur bed starts as a pile of logs and branches. Then spent straw, old compost (see pile on right) and only an inch of topsoil finish the job and ready the bed for planting.
In the first season my crop of Bok Choi is too successful on my Hugelkultur pile. I have trouble eating all these early season vegetables and giving away all the extras.
By year five, the downhill side of each pile is shored up with pre-used bricks and the beds become “mixed” plantings in true permaculture style with a variety of plants thriving in my now mature Hugelkultur beds.
I have recently moved back to Calgary. The soil in my garden is great, but my desire to save money buying new soil to fill planters persists so in my new garden with old-school lawn and flower gardens I am trying Hugelkutur techniques within my Sproutbox garden planters. The main reason for trying Hugelkultur again is to see if plants grow better in these containers compared to just using local soil. This is important to gardeners who do not want to buy as much soil as it takes to fill such large Sproutbox or any containers.
But there is also a water holding component to Hugelkultur and a slow-release fertilizer component as the wood and compost break down further. I plan to use one sproutbox as a Hugelkutur bed and one as an all-soil bed. Soil in both boxes will be local, from the same source. And it will be the same depth and will receive the same amendments before and during three growing seasons. If I can control myself I will also plant the same vegetables in my the side-by- side planters in the spring of 2024.
The Outdoor Vegetable Planters
I ordered four 6.5 foot long Sproutbox planters in slate grey. I chose this dark colour because I live in a cool climate and I want to benefit from the power of the sun on warm spring days. I know seeds germinate faster in warm soil and I know light colours reflect more sun and heat, so soil will stay cooler in light-coloured containers.
All the boxes I chose are 2 feet wide, although a 3.5’ wide box was tempting me and is another available option. But I don’t have space inside my greenhouse or in my front yard for this much planter box area unless I tear up more soil or use up more greenhouse space, so I’m staying with the narrow boxes.
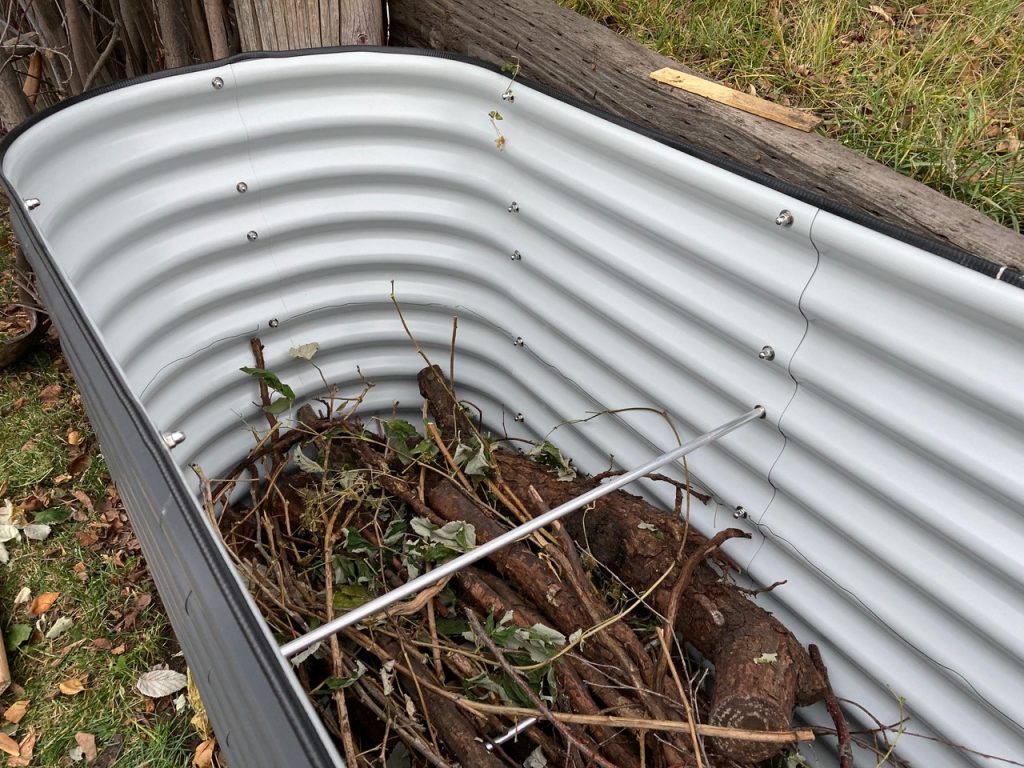
Usually Hugelkultur is composed of piles of wood, branches, straw, leaves and old partially or fully finished compost. I start by placing the heaviest available woody materials in the bottom half of the box, topping it with fine branches from my fall raspberry pruning and topping that with old partially finished compost. This container will be built next to an identical but shorter container that doesn’t contain hugelkutur materials.
All boxes will be the same height, except for the Hugelkultur box, because I decide to fill the container as deep as possible with woody organic matter. This is in keeping with my other Hugelkultur beds – the deeper the better really, so the hugelkultur container height is 32” deep. The other boxes will all be 17” deep. All boxes will be topped with a 1” cap of quality worm castings (LISTEN TO MY PODCAST ON WORM CASTINGS HERE) at the beginning of each of three growing seasons.
The Sproutbox gardens in my front yard will be used as-is and there will be no landscape fabric under or inside the two boxes. If soil levels in one or both boxes dip drastically between the first and third season, the same soil or amendments will be added to bring the soil level up to within an inch of the top of the container each spring. Front yard boxes will run South to North with the long end facing directly West. Back yard boxes will run East to West with the long end facing South.
Setting up Sip Boxes
SIP boxes are also called Sub-Irrigated-Planters or Wicking Beds or even self-watering planters. In the back yard, both inside my greenhouse and outside, the boxes will run east-west because of the layout of my greenhouse. One box will be inside my greenhouse along a south facing wall and the other will be outside the greenhouse but with the same orientation.
The soil in these beds will have mostly potting mix (like Pro-mix HP ) because the soil needs to be lighter than my native soil with an ability to wick up moisture. I will use amended soils in the top 11” depth (28 cm) above a 6” layer of round, washed gravel and rigid French drain style pipes (See example of this HERE). A layer of fabric will divide the lower rock or french pipe layer from the upper soil layer (to prevent soil from contaminating the water layer.)
An irrigation pipe will be cut to size, extending from the bottom of the box to the inside top of each box. A neutral material will be found to create a water barrier on the bottom – I am thinking pond liner but am not confirming that at this time. Just above the water layer, holes will be drilled into the sproutboxes so that water doesn’t overfill and flood the soil. Instead, it will spill out once at the water level. If you need more general information to build a SIP pot or wicking bed LOOK HERE.
It is always a good year to plant vegetables. Here is a photo of Mali picking carrots when she was 2. She is now 19 and is growing micro-greens in Calgary full time!
Vegetable Planting Schemes and Dreams
Crops planted from season 1-3 will vary and will be mixed. I don’t want another repeat of the “too much Bok Choi” years and I expect outdoor vegetables to include spinach, potatoes, kale, lettuce, beans, peas, carrots, arugula and other crops in about the same position in the pairs of boxes. In Calgary, cool crops are planted in or around mid-April with warmer season crops like cucumbers and zucchini planted later in May. Because I have various heat holding materials such as Agribon and Growcover (https://www.veggiepatch.com.au/) to place over my beds I will definitely start earlier than normal for my climate.
Expectations From Sproutbox Gardens
Both front yard boxes will be open to the ground below and will be the same colour so internal heat in the beds and drainage in the beds will be the same unless the water holding abilities of the Hugelkultur are stronger than I expect.
In the back yard wicking beds facing south I will plant cucumbers and/or tomatoes in year one, squash or peppers in year two and tomatoes and cucumbers again in year three. I may also add a winter crop of arugula or spinach in the greenhouse to make best use of my covered growing zone.
I expect the Hugelkultur and the greenhouse wicking beds to grow best, but there will be ongoing record-keeping and evaluation using a new Three-year Gardeners Gratitude Journal dedicated to this one project.
Partially composted organic materials such as old bark mulch, roots of old plants or compost that is unsifted and still unfinished are all fine for stuffing between the woody materials and layering on top of wood.
My three year journal will help me track the vegetable growing success in the boxes, the soils we use and the vegetable harvests. If one box is doing dramatically better than the other I may choose to change all boxes to the winning system by year 2 or three but that is getting ahead of myself.
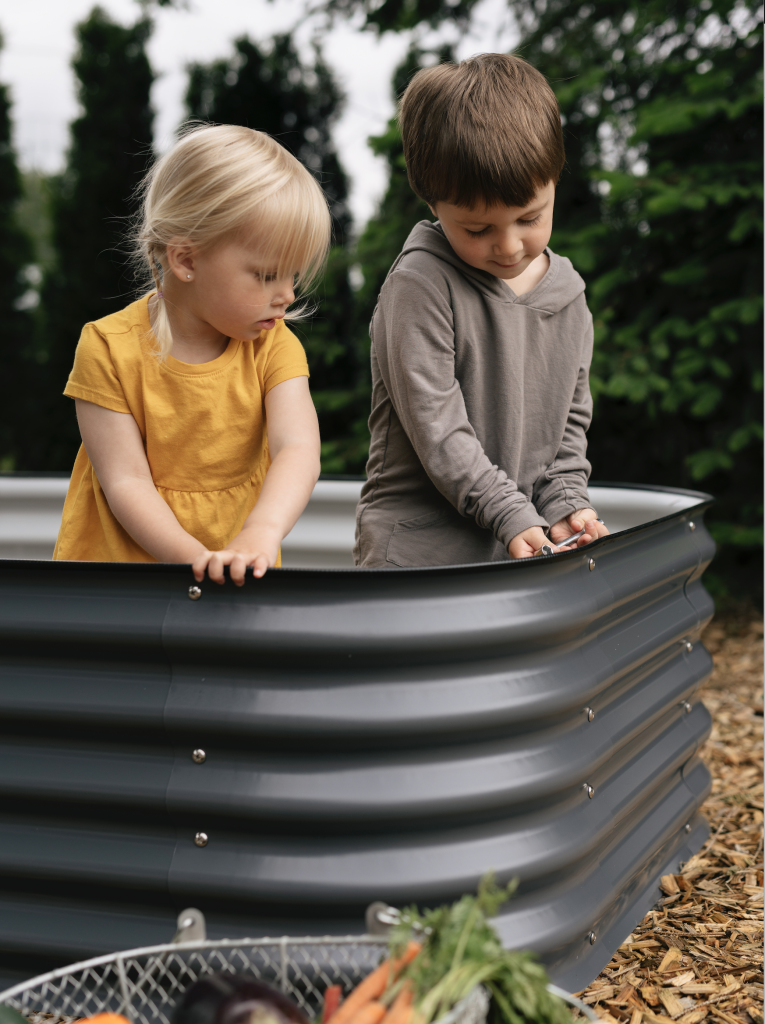
Photo Courtesy Sproutbox – showing rubber edge to keep hands safe when working in box.
Results From Sproutbox Gardens
Watch this blog post for crop information recorded and published at least a couple of times or sign up for my newsletter HERE to see monthly updates. Barring an extreme season, I expect the greenhouse box to do best followed by the second wicking box and finally the Hugelkultur box. The fourth box is really just a control.
It is Still Early Days for Growing Food
I have received my boxes and I am excited because I love growing but as I age I hate bending over and kneeling down on the ground. I am also in Calgary, a colder climate than when I first trialed Hugelkultur, and I want to give my plants all the advantages I can. Using raised beds really helps heat the soil and encourages faster root and plant growth. Naturally available Nitrogen, a common element plants really need, is often unavailable in raised bed cold spring soils because they heat up and release nitrogen to growing plants. And in cold soils bacteria multiply, divide and produce waste nitrogen oh so slowly compared to the warmer soils of raised beds gardens.
It is early days for growing food in my new sproutbox gardens. I still have to find a way to make wicking beds out of these garden shells. So stay tuned. There is definitely more to come. And if you want to join in my experimental project order your own Sproutboxes with my discount code DonnaB10. If you want to order enough sproutboxes to fill an entire community garden or farm, send me an email because there is probably a bigger discount available to you.
Anyway you grow food is good. Using raised containers is easier than growing on the ground and using food-safe, 20 year guaranteed planters is even better. I encourage all grandparents to buy a unit for their kids to try. Or, heh, abandon your old wooden beds like Bill and Marinette did and try something new for yourself next spring.
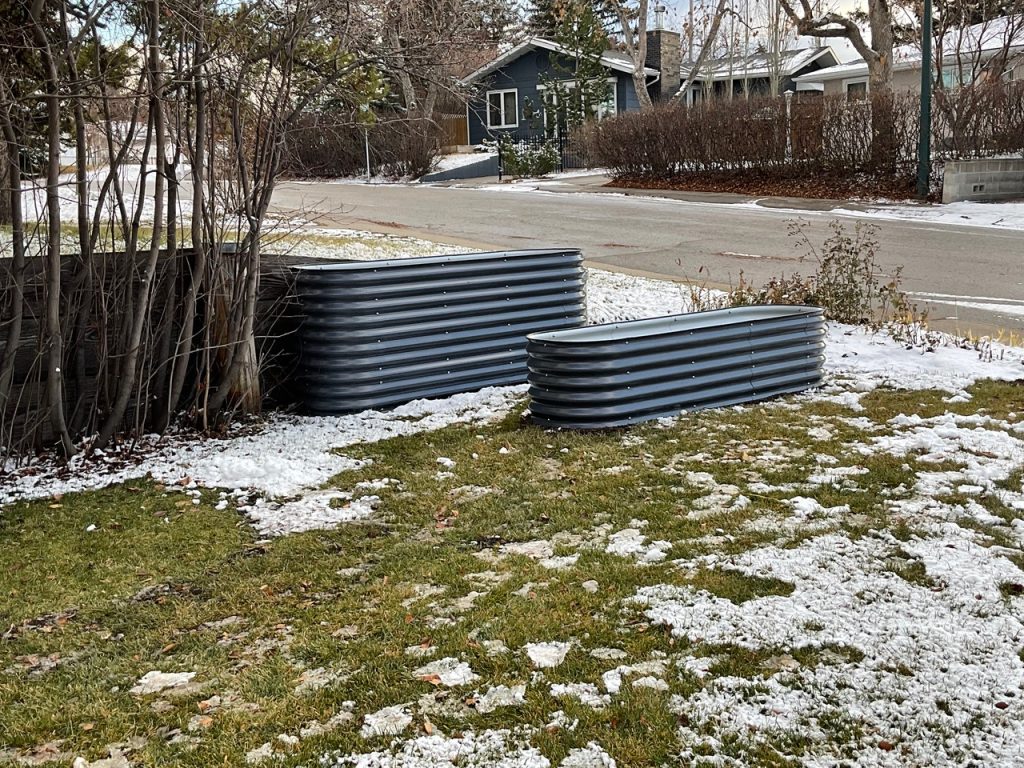
I finished building and filling my two outdoor Sproutbox gardens just as the snow started falling in November. I will plant them in spring but, even unplanted, they already look fabulous in my south facing front garden.
PS Nine years after building my Hugelkultur beds on Vancouver Island the new owner flattened the mounds this fall and they are no longer raised beds. Very little woody material is evident now and the beds are just like any other garden bed with no difference in appearance or potential.
*PPS I expect the wicking beds to require mostly soil-less mix, so they have maximum wicking potential.