I help gardeners grow
& beginners blossom.
No seed left behind,
no soil unturned.
Together we can have lots of fun growing
great gardens using simple practical tips.
- Featured in -


Start saving & storing your garden seeds for a more more sustainable future
SIGN UP to get the FREE Seed packet PDF

X CLOSE

Next Steps for Gardener’s Growing at Home
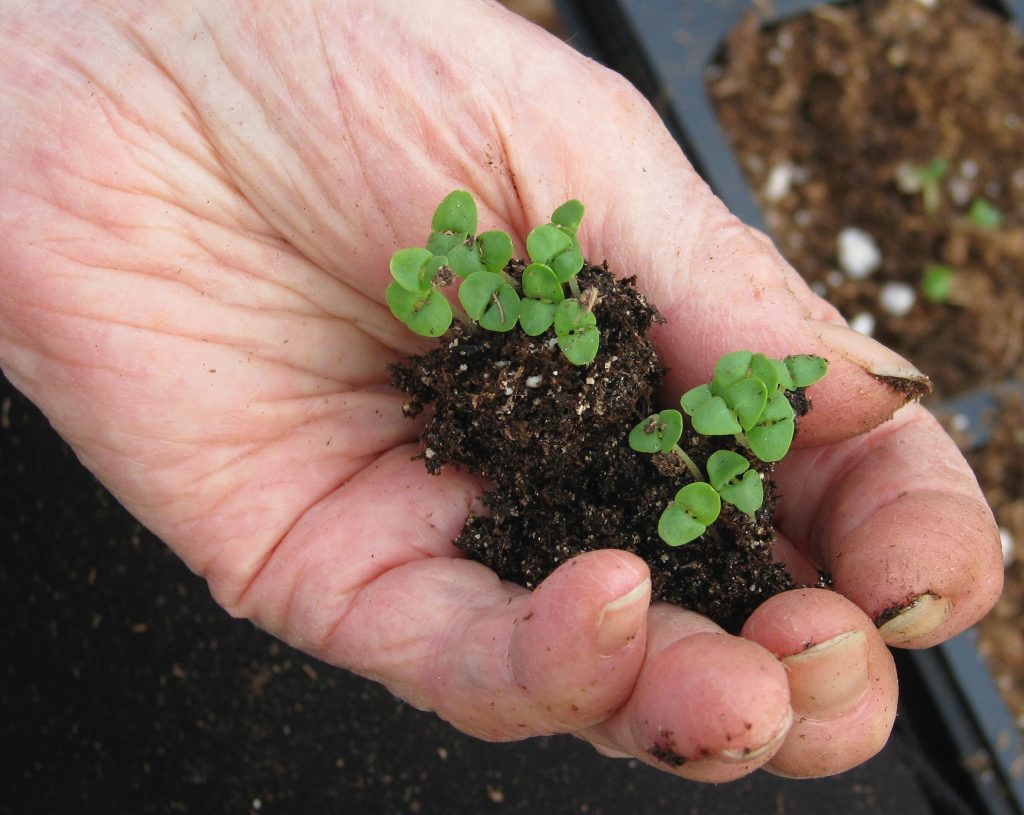
After seeding – what next? This is a photo of my 90-plus mother’s hand holding basil. Della gardened all her life and loved to get her hands dirty at home and in her garden.

Barry Furneaux introduced me to Steve Solomon and his the intelligent gardener book. In his garden he is growing not one but two heads of broccoli per plant plus 22 pound cabbages. This is amazing and is done with natural soil, not soil-less mix containing mainly organic materials.
Soil test for potential chemicals:

Chemical damage on Rudbeckia- seen here with the weird petals in the flowers at the top of the image – is a sure sign of chemicals carried in compost and existing in soil. This takes a different kind of soil test than we normally think of. This takes a Bioassay- best done by the gardener.
Deanna was concerned about growing food in a natural soil because it could be a real mess. It was via a connection though a relative that she used a lawn care company and sprayed her lawn on a regular basis. She was not sure if the sprays included fertilizers and pesticides. “No Worries!”, I told her. Just do your own Bioassay (an easy home test) to find out if you have persistent pesticides in your soil. If you have long lasting herbicides like Clopyralid, they will persist in soil for 20 or more years. And meanwhile it will cause trouble in all your potatoes, tomatoes, peas, beans and sunflowers. To do this test grow a bean (or pea or sunflower) in a pot in the soil or compost you are worried about.
Better yet, use three or four pots from different parts of the compost or soil pile. If the leaves are curled under or abnormal do not use the soil. Keep in mind many kinds of compost also have latent chemicals. It is a dirty world out there. But in Canada most lawn care companies know this now and are careful to use only products that breaks down quickly.

Herbicide damage on tomatoes is often seen as tightly in-rolled leaves. Occasionally these symptoms are also caused by too much nitrogen fertilizer. Watch and see if the plants outgrow these symptoms and if they do excellent! If they do not you probably picked up chemicals from your compost or your soil. These plants are now considered toxic waste and need to be garbaged, not composted.
Regardless of your Mineral soil test and depending on your bioassay, use existing soil mixed with a good quality bulk compost (do the smell test – a nice earthy smell in the compost is good, and a sulphur smell is bad.) Consider mixing your base soil (what is currently piled up as your topsoil) together with compost at a 50-50 mix. If the soil is heavy, mix in Biochar with your compost before you add it to your soil.
Airterra Biochar: an optional item to add to your compost as you make it. This adds permanent organic matter over time. The goal is to add about 10% biochar by volume to your compost as you make it so that it becomes incorporated into the finished compost and will be useful in garden in the future because it doesn’t break down.
Prepare to plant outside:

This image shows the fleece cover pulled away to see the young lettuce protected from full sun and visiting bunnies. After just a few weeks, transplanted lettuce under fleece is ready to eat and when you put your hand on the soil it is a lot warmer than soil without a cover. Notice the wire supports the row cover so it doesn’t weigh down lettuce.

Butter Lettuce under my fleece today is still growing but I am picking it now as fast as I can eat it.
Use the fleece or row cover to protect new seedlings when you move them from the house to the great outdoors. Fleece comes in various brands (Reemay and Agribon are common) and it also come in various weights and heaviness. In the spring it offers wind and sun protection as you are getting plants ready to growing outdoors. You can use a bracket along the sides of your wooden edges and insert the white irrigation pipe to hold this cover in spring and again in fall. Take off fleece (Agribon) once plants are established in spring and put it back on before fall frost. Plants could overheat on warm days so plan this carefully.

An overview of fleece over lettuce in my garden early in spring. It is simple and easy to use, can be washed between uses, and can be rolled up to save for another season after use. Notice I use wire to hold it and rocks to weigh down the light fabric.
Another idea for planting heat-craving crops like tomatoes is to use fencing wire and plastic over the plants when they are planted outside early in the season. See more about this in my book No Guff Vegetable Gardening.

Check out one more way to protect tomatoes early in the spring. Maggie used wire fencing covered in plastic.
Timing and Planning for best results
Always remember some plants are cool season crops (radish, spinach, leaf lettuce, mustard greens, peas and everything in cabbage family) while other are warm season (Tomatoes, corn, potatoes, cucumber, squash, beans). Cool season crops can start going into the ground shortly both as direct seed and as transplants. I often start peas by early April and Spinach in the fall so it can come back as early as March. Transplant some peas but start others directly in the cold soil. See what works best in your microclimate.
Start tracking your dates and success by writing in a journal…. mine or someone else’s!
Donna Balzer is the Brand Ambassador for BCGreenhouse Builders and she has two greenhouses in her big backyard.


[supsystic-social-sharing id='1']


What Would Donna Do?
Get my growing and gardening tips and pointers throughout the season.
0 Comments