I help gardeners grow
& beginners blossom.
No seed left behind,
no soil unturned.
Together we can have lots of fun growing
great gardens using simple practical tips.
- Featured in -


Start saving & storing your garden seeds for a more more sustainable future
SIGN UP to get the FREE Seed packet PDF
X CLOSE
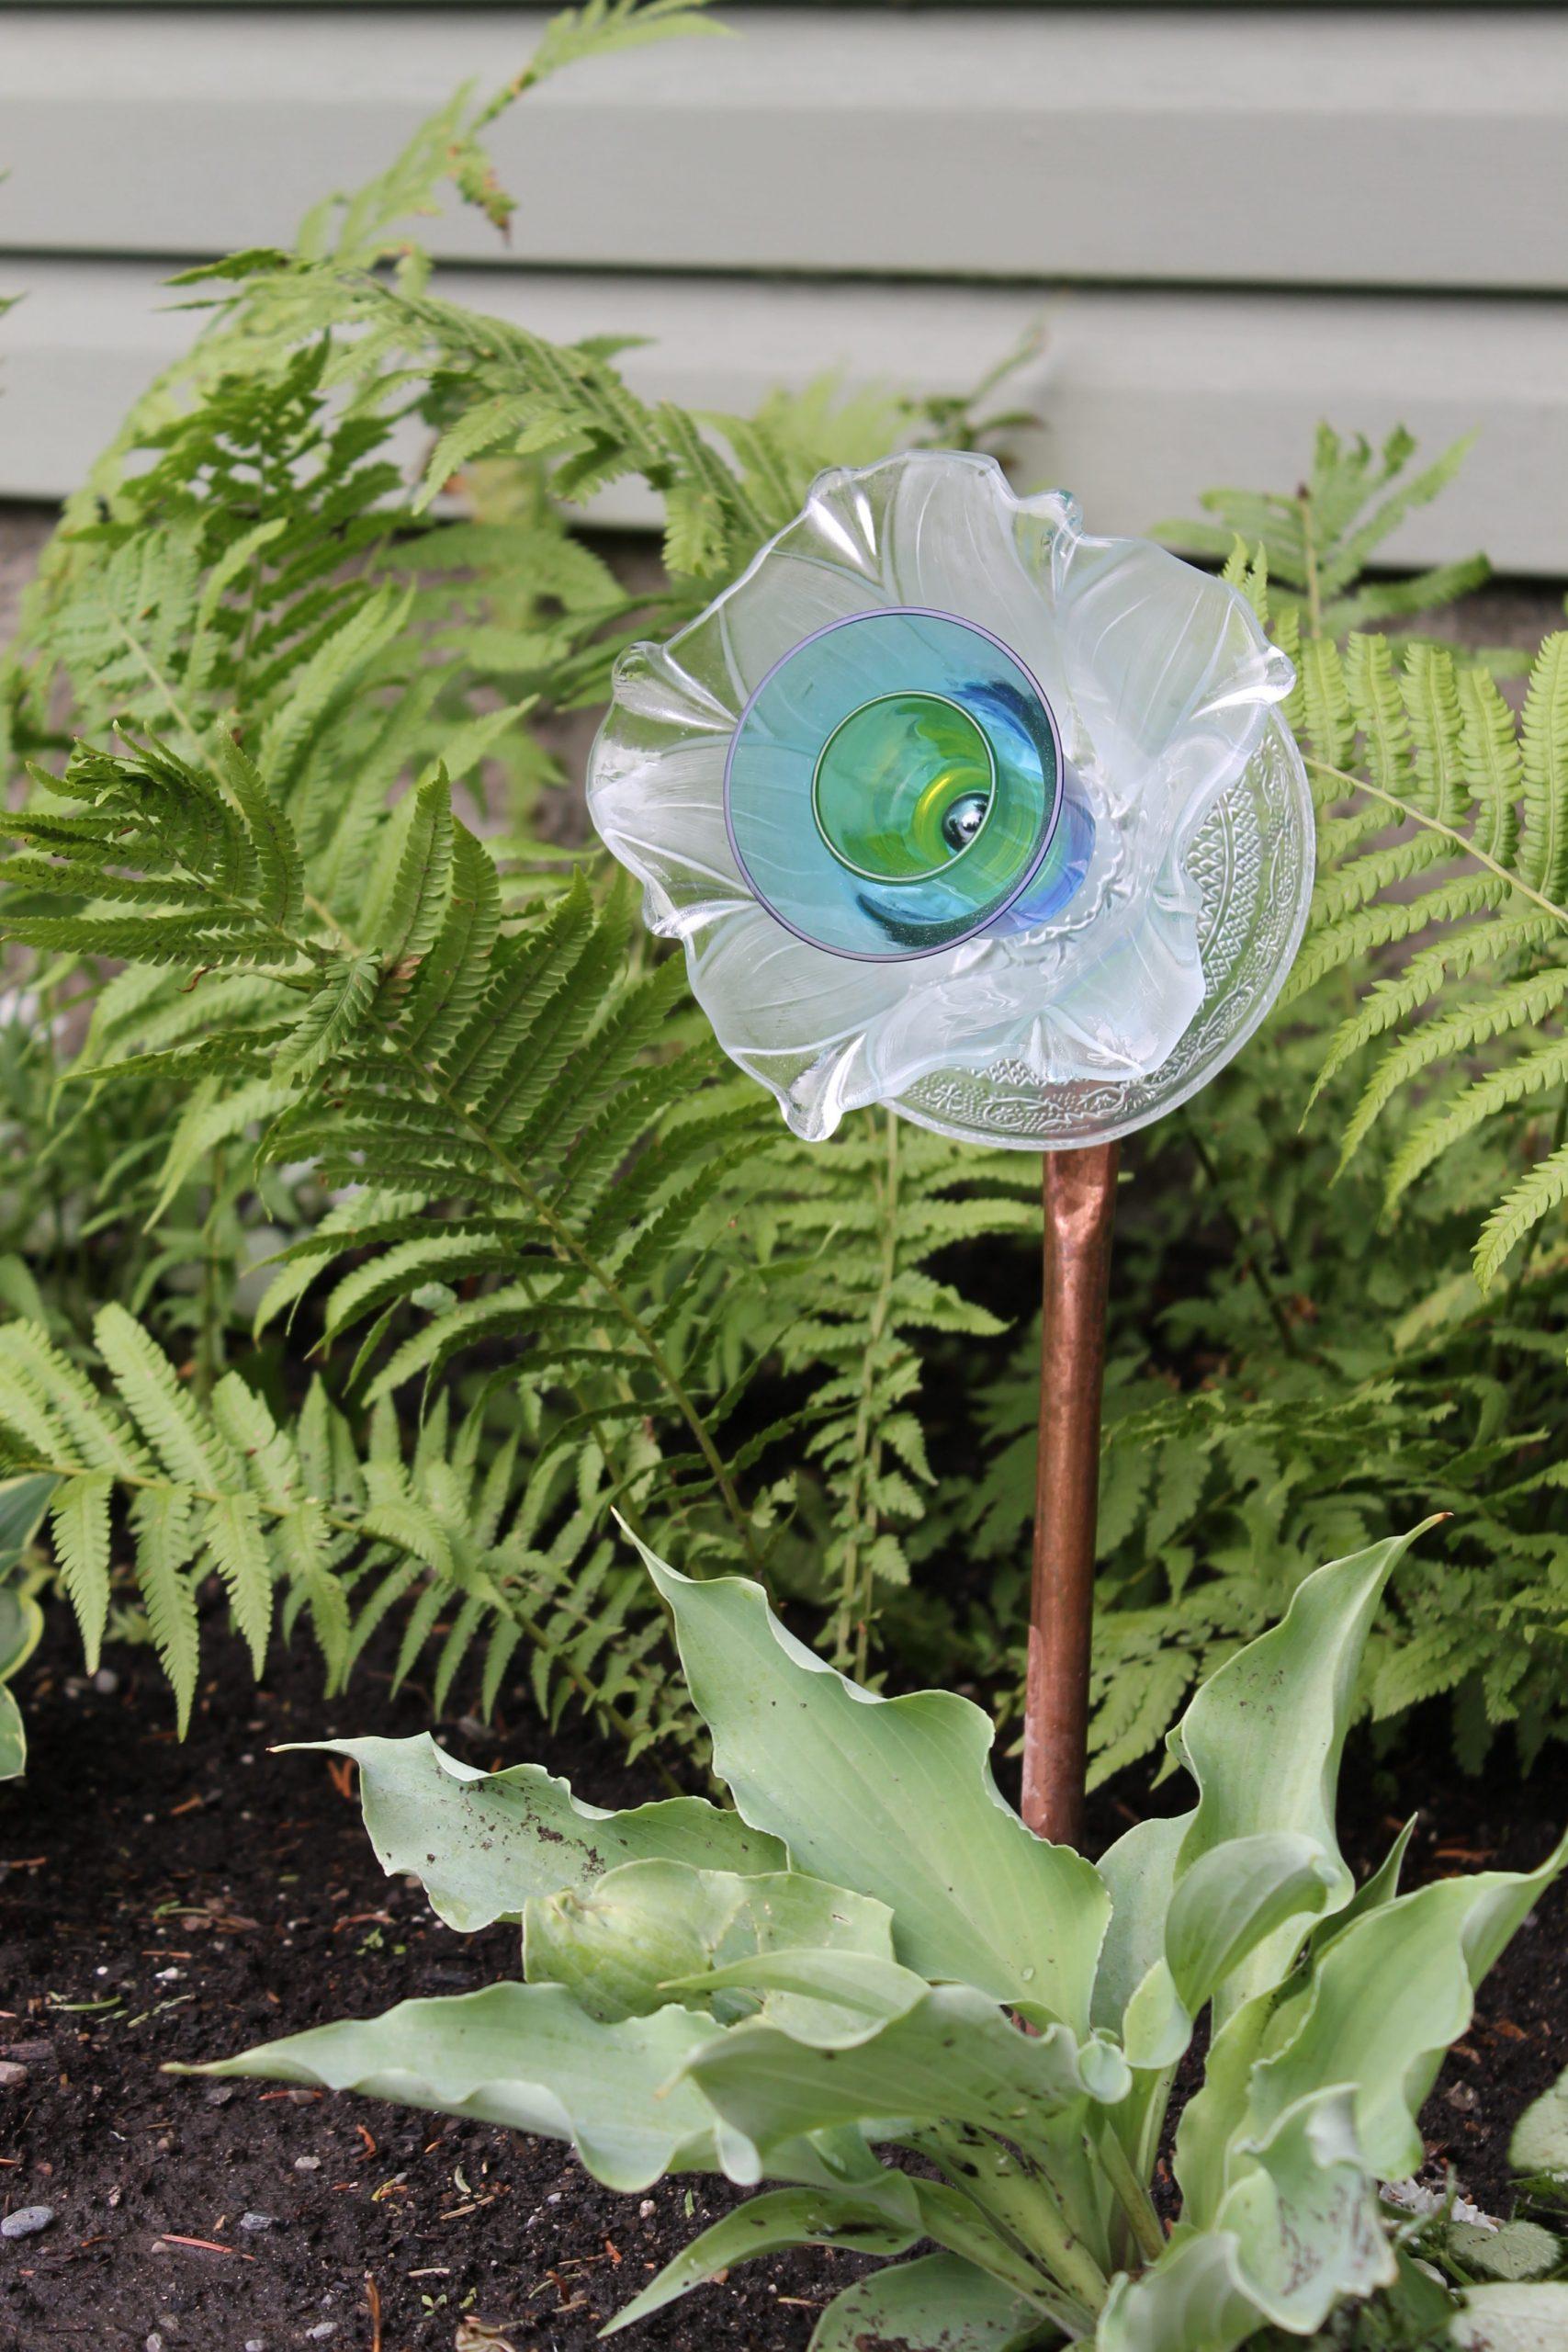
Calgary Reader Sends Her Own Version of Glass Flowers Complete With Instructions!

In August I attended the GWA meeting in Buffalo and photographed these lovely glass plates made to look like flowers. I sent the photo to the Calgary Herald and they used it in my online garden article (August 17, 2017.)
As soon as the article hit the news, Wendy Savi sent me photos of her own creations, very similar to the ones I had photographed in Buffalo and she said I could use her photos, with her permission, and this comment:
Thanks for sharing these, I really appreciate it and hope they make they someone smile. Wendy.
And then I asked her for more! I wanted directions on how to make flower plates and Wendy agreed! Here is what she sent:

Instructions to Make Glass Flowers for Your Garden
This is a great way to upcycle and repurpose dishes and other odds and ends.
Start off with clean dishes so that the silicone will adhere. I often give the dishes a wipe with rubbing alcohol after I wash them. Play around with your arrangement till you find something that works for you. Silicone the dishes together with GE Clear Silicone II and let the arrangement set for a day. Don’t be skimpy with the silicone!
You might find that raising a smaller dish slightly by gluing glass filler beads underneath it, helps to provide more depth to a piece. For the centers, try using items like glass filler beads, brooches, liquor glasses, candle holders and large beads.
After your flower has dried, you need to attach a hook to the back. To make a hook, flatten a tablespoon and then bend it where the handle meets the bowl of the spoon. The handle should be around 45°, you can always adjust it. Strong teenagers and a sledge hammer are great for flattening the spoons. Again, make sure everything is clean and then silicone your hook the back of your flower. I let mine dry for 3 days before I display them.
Purchase a piece of ½ inch copper pipe and slightly flatten one end with a hammer. The handle of your spoon needs to be able to fit into the flattened end of the pipe. To display it in the garden, insert a garden stake first and then put the copper pipe over the stake, I find this gives it more support when the soil gets wet. Another option is to hook it on a trellis or fence. During the winter, store it in a garage or shed, or bring it into the house and use a plate stand to display it.
This is how I make my flowers, but there are other ways of attaching the dishes together and attaching a back so that they can be displayed, the internet has some information.
And if worse comes to worse, if you’re in Calgary or Olds, I have some for sale!
Wendy (403-990-1763)
If you want to contact Wendy go ahead. She says she has extras for sale ($35.00- $40.00 plus cost of copper stand)! Thanks Wendy. It is so great when gardeners share.
Leave your comments about her work or this article here.


What Would Donna Do?
Get my growing and gardening tips and pointers throughout the season.





0 Comments